Showing posts with label Tips. Show all posts
Showing posts with label Tips. Show all posts
Wakfu Beginner Guide
Wakfu is quite a difficult game to begin with, especially with 12 character class to choose from. But do not worry as the time goes on, even the first timers will found out that Wakfu is not that hard. To make it easier, here is the beginner guide for Wakfu, which covers 5 basic guide at the beginning of wakfu. Hopefully, after reading this Wakfu beginner guide, you can play and understand Wakfu better. At the beginning, it is actually obvious, you need to sign up, download the client's application, start the game by login, and lastly, create your own character. If you confuse of which character you should choose, some of the best class for first timer in Wakfu is including Cra, Iop, Sacrier, and Sram. As for point allocation, just spend it all on your HP.

Guide 1: First area
In this chapter, you need to open the spells window and assign fire speel to the toolbar in order to gain spell xp. Then, use the Fire spell to defeat your very first enemy in Wakfu, the bow meow. Spend 5 points for HP and save another 5 until you decided how you will build your character's class. At level 5, all of your basic abilities will become available.
Next on, go through the zaap to go another zone to fight a wodents and iop lady. This time, you should have unlock your 4th spell.
Guide 2: learn about Combat and Ecosystem
Continue on the Wakfu beginner guide, just go through zaap one more time to go to different zone, which bring you to the other side of the bridge. In this Wakfu's guide chapter, you will learn about the combat system as well as the ecosystem around the world of Wakfu. For Combat, you will learn it on the Pandawa training Dojo with all 3 Trial rooms and just continue on with the story, which lead you to the end of this chapter. Next on, you are ready to choose your nation in Wakfu.
Guide 3: Choose your Nation
In this part of Wakfu guide, you need to decide which nation to choose in Wakfu. Considering a couple of choice to find the one that suit your needs would be recommended. Next, talk to the fat cat and you will sent to the ground level. Kill all creatures in this area until you reach level 5 then go to the Center of AStrub and obtain some good drop items by killing Humanoid enemies. Once you obtain 3 feathers, talk to the Owl Twice and you will receive Haven bag and passport.
Guide 4: Level up to Level 15
Nothing special in this 4th wakfu beginner guide, just level up your character to level 15 in order to make the next part in Wakfu easier
Guide 5: Find some friends
This is pretty important to make friends as you are now be able to hunt in parties.You can ask someone in a guild to join you in order to hunt as well as other social activities or profession in Wakfu.
READ MORE - Wakfu Beginner Guide
Wakfu
Guide 1: First area
In this chapter, you need to open the spells window and assign fire speel to the toolbar in order to gain spell xp. Then, use the Fire spell to defeat your very first enemy in Wakfu, the bow meow. Spend 5 points for HP and save another 5 until you decided how you will build your character's class. At level 5, all of your basic abilities will become available.
Next on, go through the zaap to go another zone to fight a wodents and iop lady. This time, you should have unlock your 4th spell.
Guide 2: learn about Combat and Ecosystem
Continue on the Wakfu beginner guide, just go through zaap one more time to go to different zone, which bring you to the other side of the bridge. In this Wakfu's guide chapter, you will learn about the combat system as well as the ecosystem around the world of Wakfu. For Combat, you will learn it on the Pandawa training Dojo with all 3 Trial rooms and just continue on with the story, which lead you to the end of this chapter. Next on, you are ready to choose your nation in Wakfu.
Guide 3: Choose your Nation
In this part of Wakfu guide, you need to decide which nation to choose in Wakfu. Considering a couple of choice to find the one that suit your needs would be recommended. Next, talk to the fat cat and you will sent to the ground level. Kill all creatures in this area until you reach level 5 then go to the Center of AStrub and obtain some good drop items by killing Humanoid enemies. Once you obtain 3 feathers, talk to the Owl Twice and you will receive Haven bag and passport.
Guide 4: Level up to Level 15
Nothing special in this 4th wakfu beginner guide, just level up your character to level 15 in order to make the next part in Wakfu easier
Guide 5: Find some friends
This is pretty important to make friends as you are now be able to hunt in parties.You can ask someone in a guild to join you in order to hunt as well as other social activities or profession in Wakfu.
Feral Druid Beginner Guide
Feral Druid is probably the best class on WoW if you find a character that able to inflict great damage. Besides it great damage, this class also known as one of the fastest levelers of the various Druid builds, which certainly faster than some other classes. So in short, Feral Druid is a versatile class. However, no matter how good a class is, it would do no harm to enemies if you can't built it into its maximum potential. So, if you found difficulties as building your own character with Feral class, this guide will easily tells you where to start and what to do with your character.
First of all, you need to choose the race for Feral Druid. It is actually pretty difficult as you have a couple of choices, including Alliance - Night Elf, Horde - Tauren, Alliance - Worgen, and Horde - Trolls. Each and every race has their own advantages and disadvantages, so lets know more about each race in order to determine which race should you choose:
Feral Druid

- Night Elf; This race will allows you to be able to ambush better thanks to the Shadowmeld that stacks with your stealth. Quickness of Night Elf also makes you harder to hit, which is not a bad chance.
- Worgen; Choosing this race will allow your character to be able to run faster periodically, though it is a pity that it doesn't stack with your travel form or even your increased speed talents. Another advantage of this race is you will get Increased Critical that surely useful when you in a pinch.
- Tauren; With more health as well as War Stomp, you will easily stun enemies and it could helps a lot on PvP or when you need to run out of combat.
- Trolls; Probably the best race for Feral Druid as the Berserk is able to increase the already high attack of this class of Druid. Other advantage such as Regeneration, Greater damage, Increased critical chance, and Reduced duration of movements even makes this race looks as the most suitable race for Feral Druid.
After choosing the race, the next thing to consider as Feral Druid is to spend 31 points in Feral. All the basic abilities of Feral Druid are including:
- Mange; able to inflict damage as well as adds bleed
- Aggression; increase attack power
- Vengeance; for bears only. When you take damage, your attack power will be increased
- Feral Instinct; sneakier than before
- Master: Savage Defender; able to inflict more damage
- Razor Claws; add bleeds for more damage
In the end, there is no such thing as the best set up for you as Feral Druid, whether it is in term of race or the points spend for Feral basic abilities. The only thing that make the character best, just match it with your gameplay as it will feels like your build for Feral Druid is definitely the best. The same thing also can be said about choosing profession, items, weapons, and many other setup that required to build a perfect Feral Druid.
Minecraft ModLoader 1.2.3 - Installation Guide
Minecraft ModLoader 1.2.3 is one of the most popular Mod for Minecraft. But the interesting is, even so this mod for Minecraft is popular, this mod actually don't do anything in game like many other mods for Minecraft. Actually, the name already spill all of the mod function. Where most of the mods for Minecraft does change something in term of graphic, object, or even gameplay on the game, this Mod's main function is to loads Mods. No wonder that this mod become very popular as it allows Minecrafters (Minecraft fans and players) to easily install and run any Mod. Some even said that ModLoader is the must have Mod for Minecraft players.
On the other hand, Minecraft ModLoader 1.2.3 becomes such a platform for every modders and mod they created. Most of the time, some Mods that you downloaded probably require you to install ModLoader first before finally able to use the downloaded Mod properly. Although it makes the modder's work easier, it still has a single backward, which is requires you to use the same version of ModLoader as the version of Minecraft. Because if its not the same version, then your Mod and ModLoader will not be able to work properly. So, it is recommended to know your version of Minecraft first before deciding to install any Mod, including ModLoader. The best thing probably is to install the latest Minecraft game as it is easier to determine which Mod and ModLoader that you need to use.
For beginners in Minecraft, installing Minecraft ModLoader 1.2.3 would be pretty difficult as it is involving the main system's files as well as command lines. It is difficult because one small mistake can lead you to reinstall the game from the beginning. However, most Minecrafter that already uses ModLoader as well as other Mods that change something in the game, playing Minecraft without Mod at all would like avoiding the best part of this game itself. So, in order to know the best of Minecraft and increase the fun as well as gaming experience of this game, installing ModLoader and other Mods afterwards is definitely a step that every Minecrafter should takes.
Minecraft ModLoader 1.2.3

Luckily, this latest version of ModLoader, the Minecraft ModLoader 1.2.3 makes all Mod installing much more easier, which claimed that even beginners in Minecraft will be able to install Mod with the first try, surely after reading some installation guide. To install Mod using this latest version of ModLoader, the user actually only need to copy and paste the mod in specific and leave the rest of difficult task to ModLoader, which leave you in how to install the ModLoader itself. So, read the installation guide below:
ModLoader 1.2.3 Installation in Windows
1. Go to Start Menu, choose Run and type in %appdata%
2. Go to .minecraft/bin
3. Open minecraft.jar with WinRAR
4. Drag and drop the files to minecraft.jar
5. Delete META-INF folder
6. Enjoy
Hopefully, this guidance will helps you a lot through installing Minecraft ModLoader 1.2.3 and installing other useful Mods for Minecraft afterwards in order to get better gaming experience and enchance the fun.
Starcraft Master Level 1 - 15 Guide
Starcraft Master is the latest official Custom Map of StarCraft 2 that surely interesting for every StarCraft 2 players that want to improve their StarCraft 2 multiplayer skills. There are 30 levels of challenges in this map. However, if you ever already had played this custom map and found it too difficult, you can always check the level by level guide below, though this guide only covers the basic level of 1 -15.
Level 1; in this first simple level of Starcraft Master, just simply move one marine in circles in order to avoid to be hit by Zealot. Meanwhile, have other attacking the zealot constantly
Level 2; Move your stalkers back, shoot and back again
Level 3; Move all of your zealots to the back of platform and squeeze them between the rubble and southern ledge. Next, just attack the lings
Level 4; in this Starcraft Master level, you just need to shift queue attack commands to kill each one. Move back the unit with low hp and switch with higher Hp unit. Repeat the process until you complete the level
Level 5; attack spine with both stalkers, pretty similar with Level 4 trick
Starcraft Master

Level 6; move to the south and wait until the marines go back to the top. Then, move your lings and burrow on the bottom side. Next, when the marines move to your lings, unburrow
Level 7; Attack with colossus and move off the ledge and force lings to run back around when they get to the top of ramp. Move the colossus up the ledge when lings almost at the colossus. Repeat until you complete the level
Level 8; Easily done as you only need to blink a stalker in between two siege tanks. You will also earn an achievement in this Starcraft Master level
Level 9; you need to attack the bunker with three roaches. Burrow and unborrow roaches is the key to win this level as you also will earn an achievement
Level 10; Move back all the forces so the roaches on the bottom won't be able to support the roaches on top. Attack roaches on top with everything and kill the rest of the enemy
Level 11; This Starcraft Master level is pretty difficult. First, you need to storm with half of marines and use the other half in the second storm. If you can't beat it yet, use the high templars to keep few marines in storm
Level 12; To complete this Starcraft Master level, you need to throw an infested terran to the left marine pack and wait 3 seconds before throwing the second in the middle. Wait for another 3 seconds and throw the third below the higher HP marine. Next, wait for 6 seconds and repeat with the same pattern until you have 2 infested terrans left. Throw each of them next of each tanks at the same time to make the tanks kill each other
Level 13; One of the easiest level in Starcraft Master as you only need to move your probes to your cannon and hit hold position
Level 14; Pretty difficult Starcraft Master level. First, throw forcefields around all your sentries or stalkers while at the same time covering partially the zealots
Level 15: Turn the 2 high templar into archone, then smash the ffs and let archon and zealots kill everything to complete this level of Starcraft Master
League of Legends - Riven Guide for Beginners
In this Riven guide, you will know what are the best built in term of skill, masteries and spell in order to maximize Riven's potential in League of Legends. Many players would choose Riven due to its cool and cute image, though other reason would be that Riven is able to dealt high damage late in the game. However, let's see what are the advantages and disadvantage of choosing Riven in this game first.
Advantages:
- High damage late in the game
- Able to use spells with low CDs
- No resource system
- All Riven skills scale off AD
Disadvantages:
- Less sustainable
- Weak on solo lane
- Weaker in laning, even compared to bruisers
- Weak in early game
- Quite difficult to built at the beginning
Riven Guide

In order to cover that weakness, you can try to follow this Riven guide by using 21/9/0 Masteries in order to get the highest damage possible early in the game, which will become even more trembling damage late in the game. However, this Masteries allocation has also some weaknesses, including will set Riven at 500 Hp level one as well as provides less bonus stats. You can always use any other allocation that fit your gameplay best, though you are also welcome to follow this Riven guide in term of Masteries.
After Masteries, this Riven guide will continue on the list of Summoner Spells that perfect for Riven built, however, it is only a guide so you have the rights to follow or not to follow it. The best Summoner Spells for Riven are Flash, Ghost, Ignite, or Exhaust. Flash definitely is a great choice, but as you already learn from this Riven guide that Riven doesn't have the ability to burst, Flash is not useful for offensive. However, it still a great option for defensive. As for the Ghost, it is probably better choice than Flash as Ghost is better for Melee classes that rely much on auto attacking, just like this Riven. While Ignite would be the best choice of offensive as it could inflict extra damage in 1v1 scenarios, the better choice would be Exhaust as this spell is very useful for the most part of the game, not only in 1v1 scenarios.
Next in this Riven guide for beginners is the Skills that Riven will obtain. There are 5 skills of Riven, including Runic Blade, Broken Wings, Ki Burst, Valor, and Blade of Exile. The recommended skill order to improves in this Riven guide is to max out the Broken Wings first. It is because this skill inflicting low auto damage at the beginning. The other recommended skill order is to improves the level of Valor first as it makes laning easier for Riven, who weak on laning.
In the end, this Riven guide is not meant to control your gameplay while using Riven in League of Legends, but this Riven guide gives you enough information and suggestion instead. The decision still rests in your hands, whether to follow this Riven guide to build your Riven or not.
Pokemon Tower Defense Tips & Tricks
Some of the Pokemon fans out there probably have found a nice game called Pokemon Tower Defense. This online flash game is actually not an original version of Pokemon series from Nintendo, but the feature and also the 151 original Pokemon that brought to this game are very similar as the original series, which makes all Pokemon fans surely found it familiar. As online game, the gameplay of this Pokemon game surely has described alone by its name, which is a Tower Defense. Released in March 2011 by Sam & Dan games, this game bring an addictive gameplay in order to fulfill every Tower Defense and Pokemon fans all over the world.
Pokemon Tower Defense

Also, unlike playing the original Pokemon game, playing this Pokemon Tower Defense is definitely not too hard at all. All you need to do is just collect resources, choose your main line-up and prepare to fight. Even so, there are still some tips that you can use in the game to make it easier, here they are:
- You can restart the game as often as you like as it is fast and free, so whenever you feel that the game don't go your way, just restart the game and try again
- Always try to keep at least four mining stations that running at all times
- Never too secure about the amount of cash you have
- It is recommended to invest in the strength of your mining station whenever you have spare rubies
- Although towers is almost everything in this Pokemon Tower Defense, don't be afraid to lose them as you can build them again
- Towers mostly are also the main distraction from your Gem, so worry about the gems more
- Besides invest on the strength of mining station, investing rubies on an under attack tower's health also a good idea
- When you are almost lose a tower, don't ever use the ruby to invest on its health, but self destruct it instead as self-destructed tower gives you all the rubies back to use again to build another tower
- In this Pokemon Tower Defense, quantity won over quality. So instead of upgrading only a few tower, it is better to build more tower
- You can create a super powerful tower, but it requires a lot of rubies. However, this powerful tower will eventually lost it stand after attacked by the enemies, which attack the most powerful tower at the beginning of their attack
- Never stock on Rubies as if enemy can get hold of your rubies, then your game is over. The best thing is to spend on every Rubies you have to invest on building towers
- Use Mag Towers at the front of anything valuable as Mag Towers are very cheap and can become a great waste of energy on the enemy's side
- Another usage of Mag Towers in Pokemon Tower Defense is to place two Mag Towers near each other so they can caught enemies in a zone so they can't attack anything.
Assassin's Creed 3 Rumors and News
Lately, there was a good news about Assassin's Creed 3 for gamer, especially for Assassin's Creeds series fans. The news mentioned that Ubisoft, as the developer has announced that the this latest game on Assassin's Creeds Series will be launched at the October 30th this year. Ubisoft CEO even promises that the launch of their latest Assassin's Creed game will be different from any other game launching, especially from Ubisoft. Even so, there are no futher info yet about what kind of launching that the Ubisoft CEO promises would be.
As for the game, Assassin's Creed 3 will be one of the game that require computer with high end specification, it is because Ubisoft claimed that they are able to create an awesome graphic, which will takes place on 16th century in Constantine. According to some rumors, this game will be telling story during years 1753 and 1783, which where native American was involved in war with British. That time, a Native American, the Mowhawk are conquering America, where the bloody battle begin as British wants to conquer the land of America as well, only by force.
Assassin's Creed 3

Other rumor also mentioned that Assassin's Creed 3 will brought a new protagonist named Conner, which is a half English and half Native American. With English father and Native American mother, Connor's childhood will be an interesting part to follow and play. Moreover, Connor are raised by Mowhawk, where he known with other name, Ratohnhake:ton (pronounced Ra-doon-ha-gay-doo). But when story goes on, the tyranny and Templars attack and burn down Connor's village, which making the whole story of this new game are about the Connor vengeance to the tyranny as he has dedicated his life to confront tyranny as well as Templars.
Besides the whole new character and story, there are also some rumors and news that mentioned some improvement and feature that offered in this Assassin's Creed 3, here they are:
- Updated Anvil game engine that able to put thousand-man battles on screen
- New animation system with impressive facial animations for the characters
- New platform that allow players to be able to climb trees and mountain cliff
- Players will be able to meet America's founding father, including George Washington, Benjamin Franklin and Charles Lee
- Combats in this game are focusing on putting Connor on the offensive
- Combats are based on speed or momentum
- New engine are allow the main character, Connor, to have more than thousands of new animations to support the combat system
- The combat animations of Connor will not met on other titles as it made uniquely
- While story are centered around Boston and New York
- Various historical events and places will be experienced by players, including the great fire of New York, visiting Valley Forge, and more
- Although coming with new character, the overall story is still around Assassins against the Templars
- Player will be given two viewpoints, from Assassins and Templars. That is why not all Colonists are good as well as not all British are evil
- French and Native Americans will also appear in the game
- New map, the Frontier, is 1 a half bigger compared to the map of Brotherhood
- Players are able to hunt animals to collect resources. Different rewards are given depends on how the player kill animals
- Assassin's Creed 3 world will change with seasons, including cities and wilderness in two season settings, Summer and Winter
Obtainable Legendary Pokemon on Pokemon Soul Silver
As a remake version of Pokemon Silver in Game Boy, many will think that the Pokemon Soul Silver in Nintendo DS platform surely bring the same legendary Pokemon. But the best thing is, besides the same legendary Pokemon as presents in Pokemon Silver, there are also other additional Legendary Pokemon that taken from other Pokemon series as well. Read the article further to know the legendary Pokemon and how to catch them.
Pokemon Soul Silver

Lugia – This is the Diving Pokemon and the main star of Pokemon Soul Silver. You can catch Lugia after beating Team Rocket and Kimono Girls and obtain the Silver Feather. With Silver Feather on your bag, go to Whirl Islands and you will encounter this legendary pokemon at Level 45.
Ho-Oh – This is the Phoenix Pokemon and also the main star of Pokemon Heart Gold. However, you can also catch Ho-Oh in Pokemon Soul Silver by obtain Rainbow Wing first from a person in Pewter City. With Rainbow Wing on your bag, go to Bell Tower and you will encounter Ho-Oh at level 70.
Suicune – One of three Legendary Beasts that can be caught after you chase it around. The last place you need to go is the outside Bill’s House in Route 25 and you will be able to catch Suicune. Or, after you beat Elite Four in Burnt Tower.
Articuno – Can be found on Seafom Islands on Level 50. But only after you earn all 16 badges
Zapdos – Can be found outside the Power Plant in Route 10 at level 50 only after you earn all 16 badges
Moltres – Can be found after you earn 16 badges on Silver Cave. Moltres will be at level 50 when you encounter it
Mewtwo – this legendary Pokemon can only be caught after you got all Kanto badges in Pokemon Soul Silver. Go to Cerulean Cave and eventually you will find Mewtwo at level 70
Groudon – To catch this legendary, you need to obtain Red Orb that can be found from Mr. Pokemon, but only after you obtain National Dex and Receive Kanto starter Pokemon from Professor Oak. After obtaining the Red Orb, go to a cave in Route 47, the Embedded Tower. You will find Groudon at level 50
Rayquaza – This legendary is only can be caught if you have Groudon by catching and Kyogre by trading. It can be caught on Embedded Tower at level 50
Raikou – It is a roaming Pokemon that can be tracked using Pokegear’s map card. You will encounter Raikou at level 40
Entei – Another level 40 roaming Pokemon that can be tracked using the Pokegear’s map card.
Latios – Level 35 at met, you can get Latios by tracking it using the map card on Pokegear, but only after you have obtained the National Pokedex.
Each and every legendary Pokemon mentioned above can be caught normally in Pokemon Soul Silver, except for Rayquaza as you need to obtain both Kyogre and Groudon. There is no other way to catch Kyogre in Pokemon Soul Silver except trading.
Mortal Kombat Fatalities Button Combinations
Every character in Mortal Kombat 2011 game has two kinds of Mortal Kombat Fatalities. Every Mortal Kombat fans should already know that fatality is one of the main attractions of this game series. Well, without further ado, here is the list of button combinations to perform Mortal Kombat Fatalities with your favorite characters.
Mortal Kombat Fatalities Note1: these Mortal Kombat Fatalities button combinations can be used on both PlayStation 3 and Xbox version of Mortal Kombat.
Mortal Kombat Fatalities Note 2: F = Forward, B = Back, U = Up, D = Down
Mortal Kombat Fatalities

Baraka
Take A Spin: F, F, D, D, and then A/X while sweeping
U The Middle: B, F, D, F, and then X/Square while sweeping
Cyber Sub-Zero
Brain Freeze: D, D, B, D, and X/Square while jumping
Kold Fusion: D, B, D, F, and Y/Triangle while jumping
Cyrax
Buzz Kill: Press F, D, F, B, Y/Triangle when touching
Nothing But Net: Press B, D, B, F, X/Square when in jumping
Ermac
Mind Over Splatter: Press D, U, D, D, RT/R2 when in jumping
Pest Control: Press F, B, F, D, B/Circle when in jumping
Jade
Half Mast: Press B, D, B, D, B/Circle when in sweeping
Head-A-Rang: Press U, U, D, F, X/Square when in fullscreen
Jax
Smash And Grab: Press B, F, F, B, Y/Triangle when touching
Three Points!: Press F, F, B, D, A/X when in sweeping
Johnny Cage
And The Winner Is!...: Press D, F, D, F, B/Circle when in sweeping
Heads U!: Press F, F, B, D, A/X when close
Kabal
Hook U: Press B, F, B, F, X/Square when in sweeping
It Takes Guts: Press D, D, B, F, RT/R2 when in sweeping
Kano
Eat Your Heart Out: Press D, D, F, B, B/Circle when in sweeping
Heartbreak: Press B, D, B, F, X/Square when in sweeping
Kitana
Fan Opener: Press D, D, B, F, Y/Triangle when close
Splitting Headache: Press F, D, F, B, A/X sweeping
Kratos (Only available in PlayStation 3)
Fatality 1: D, D, B, F, Triangle at close range
Fatality 2: D, B, D, F, Square at jumping
Kung Lao
Hat Trick: Press B, F, F, B, Y/Triangle when in sweeping
Razor's Edge: Press D, D, F, B, X/Square when in sweeping
Liu Kang
Fist Of Flame: Press F, B, D, D A/X when in sweeping
The Beast Within: Press D, D, F, D, B/Circle when in jumping
Mileena
Be Mine: Press B, F, B, F, Y/Triangle when in jumping
Rip Off: Press B, F, B, D, and A/X when in jumping
Nightwolf
Ascension: Press D, D, F, B, X/Square when in sweeping
Little Off The Top: Press D, F, D, B, B/Circle when in jumping
Noob
As One: Press D, D, B, D, and RT/R2 when in sweeping
Make A Wish: Press B, F, B, D, and B/Circle when in sweeping
Quan Chi
Beat D: Press F, F, D, D X/Square when in sweeping
On Your Knees: Press D, F, D, F, B/Circle when in sweeping
Raiden
Just A Scratch: Press D, F, D, F, X/Square when in sweeping
Transplant: Press B, F, F, D, B/Circle when in sweeping
Reptile
Acid Yak: Press F, F, D, U, A/X when in sweeping
Weight Loss: Press D, D F, B, X/Square when in sweeping
Scorpion
Nether Gates: Press B, F, B, A/X when touching
Split Descision: Press F, D, F, and Y/Triangle when touching.
Sektor
Robo-Sek: Press F, D, B, F, A/X when in fullscreen
The Scarecrow: Press D, D, F, B, X/Square when in fullscreen
Shang Tsung
Bang Bang!: Press B, D, F, A/X when in jumping
Identity Theft: Press D, D B, D, Y/Triangle when in jumping
Sheeva
Lend A Hand: Press F, B, F, B, and B/Circle when in sweeping
Stripped D: Press F, D, D, F, X/Square when in sweeping
Sindel
Migraine: Press B, F, D, F, X/Square when in sweeping
Mouthful: Press B, F, U, Y/Triangle when in sweeping
Smoke
Smoked Out: Press B, F, B, F, and X/Square when in sweeping
Tremor: Press B, B, D, F, Y/Triangle when in sweeping
Sonya Blade
Kut-Throat: Press D, B, F, B, B/Circle when in sweeping
Scissor Split: Press D, D, B, F, X/Square when in jumping
Stryker
Have A Blast: Press D, F, D, F, and RT/R2 when in sweeping
Time Served: Press F, D, F, and A/X when in sweeping
Sub-Zero
Have An Ice Day: Press B, F, D, F, and B/Circle when in sweeping
Spinal Smash: Press D, B, D, F, Y/Triangle when in sweeping
And thus conclude the Mortal Kombat Fatalities button combination list. However, there are some fatalities that considered as classic Mortal Kombat Fatalities and not included. It is because to perform such Fatalities, you will need to purchase additional DLC. The Stage fatality and babality also not included on the Mortal Kombat Fatalities above.
Move the Box Walkthrough: Includes the Hardest Osaka Level 23 and 24
Many people that played Move the Box found out that the last two levels of each area, especially Osaka Level 23 and 24 are the hardest level of all. Even so, there are also many gamers that found other level difficult as well. Osaka has a great place on most Move the Box player’s heart as the hardest area as there are many question or request for Osaka walkthrough. It is pretty surprising as Osaka actually is only the second area out of total 4 areas, including North Pole as the last area to complete. But Osaka will be nothing but an easy task after you read this Osaka area walkthrough further that starting from the medium difficulty Osaka Level 15 until the last levels, which includes the hardest two levels, Osaka Level 23 and Level 24.
Osaka Level 15
Move the brown plank box on the far right column one space to the left, and then move the brown package on top of middle column one space to the bottom
Osaka Level 16
Move the brown package in the middle column one space to the left, and then move the red plank box on the far right column one space to the left
Osaka Level 17
Move the gray chest on the bottom right one space to the right, then move it again one space to the left
Osaka Level 18
Move the brown package on the far right to left two spaces
Osaka Level 19
Move the green chest on the left of second row one space to the left, and then move the green chest on the right of second row one space to the left
Osaka Level 20
Move the brown package on the middle column one space to the right, and then move the brown package on far left one space to the right
Osaka Level 21
Move the brown package on the bottom left one space to the right, and then move the green chest on the top right one space to the left. Last, move the same chest for another space to the left
Osaka Level 22
Move the gray chest on the top right one space to the bottom, and then move the green chest on the bottom right one space to the right. Last, move the green chest on the top one space to the left
Osaka Level 23 and Level 24

Osaka Level 23
Move the red plank box on the bottom one space to the bottom, and then move the gray chest on the bottom left up one space. Last move the dark brown chest on the bottom right one space up
Osaka Level 24
Move the brown plank box on the topmost one space to the bottom so it switches with green chest. Then move the same green chest one space to the right so it switches with gray chest. Last, move the first brown plank box one space to the bottom.
Hopefully, after knowing the answer for each level Osaka area, including the hardest level, Osaka Level 23 and 24, you are now able to solve the rest of the level easily by your own logic power. After all, Osaka Level 23 and other hard level are made to be solved with logic.
Fallen Earth Beginner's Guide: Character Creation
Recently, Fallen Earth is available to download through Steam as announced by Gamersfirst. Actually, this game originally launched a couple years ago, but the developers decided to reintroduce this free to play MMO game on Steam. To get the F2P version, you can download via Steam client or make purchase using the Steam Wallet. Besides getting the copy of the game, you who purchased the game will receive three days of Commander Premium and Trashy the Hermit Crab pet as well. This is valid for those who purchase the Fallen Earth game either via retail or original release on Steam.
Fallen Earth

For first timer, Fallen Earth could be very confusing as there is complex system behind this game. But for now, you will only learn about the character creation on this game in order to get the best developed character and make the whole game easier. Even so, you don’t have to oblige this guidance as there probably better combination and method to create characters. In short, this Fallen Earth beginner guide is only for the first timer who doesn’t understand yet about characters and its properties in game.
At the beginning, you are allowed to have up to four characters per account. Two additional characters slot can be purchased from the games online store. But overall, four characters is plenty. While creating your Fallen Earth character, you will be given the choice of gender and options to determine the physical appearance. You can create your own character by your mean, including the one that looks exactly like you or you can just randomize the physical creation of your Fallen Earth by click the dice icons. Even so, it is recommended to create your own favorite appearance in order to keep you from boredom by using randomize characters.
Next is to name your characters, which you are allowed to select two names. All Fallen Earth characters name must unique on the server, though it is still not allowed to use punctuation or numerals in the character name. Also, if your name breaks EUAL or Code of Conduct of Fallen Earth, the Game Master staff is able to change your name without any confirmation. Again, you can also choose random name for your character by clicking the dice icon.
After all the first set up is done, you are now will be able to play the game with your characters. The first thing you need to do is surely to level up your character by getting experience points. In Fallen Earth, there are various ways to get experience points, including completing missions, killing monsters, killing players in PVP (Player Versus Player), harvesting nodes, crafting items, and few other methods.
And the last aspect on creating decent character in this game is to play attention to the Attribute points and character skill. Attribute points, or AP is the most important thing on developing your characters, so choose that suits your style of play better. While the character skill meaning the unique skill that will acquired by character depends on what you choose. Again, choose the skill that suits your style of play while playing Fallen Earth.
Under Saarthal Skyrim Walkthrough
In order to start Under Saarthal Skyrim mission, you have to complete a quest called First Lessons. During the quest, Tolfdir told that he will arrange a school trip for you and other apprentices to the ruins of Saarthal. The main purpose of this school trip is to have you and the other apprentices to learn about its past history as Saarthal actually is the first capital of Skyrim. Enough with the story! This guide/walkthrough/step by step of Under Saarthal Skyrim mission will be guide you based on each mission objectives to make it easier to follow.
First Objective: Meet Tolfdir outside Saarthal
- Go to southwest of Winterhold to find Saarthal excavation
- Meet Tolfdir and three apprentices (J’Zargo the Male khatjiit, Onmund the Male Nord, and Brelyne Marion the Female dark elf)
- Answer ‘Yes, I’m ready’ on Tolfdir question to go further on the mission
Second Objective: Follow Tolfdir
- Tolfdir will tell history of Saarthal when you go deeper to the excavation and give different tasks to all apprentices
- Your task is to assist Arniel Gane to look for enchanted item to appraise
Third Objective: Find Arniel Gane
- Go further into the ruins to find Arniel Gane
- Collect all enchanted rings that spread around in close viscinity
- Find the Amulet of Sarrthal and the scene will occur
Fourth Objective: Use Saarthal Amulet to escape
- Equip Saarthal Amulet
- Find a door that starting to glow in orange light
- Equip any destruction spell and destroy the door
Fifth Objective: Follow Tolfdir (Again)
- Follow Tolfdir to new room with altar in the middle and a scene will occur
Sixth Objective: Tell Tolfdir about the vision
- Tell Tolfdir about the vision (scene) you just experience about the danger warning from Psijic
- You will then be attacked by two draugr and ice atronach
- Use your own tactics to defeat these tough monsters
Seventh Objective: Solve Two Saarthal puzzles (Again?)
- Follow Tolfdir to a big hall with coffins
- Prepare for an attack from draugrs, defeat them
- Tolfdir will leave you and told you to move on
- Further on the hall, you will find the first puzzle of Saarthal
- Equip torch or magelight to see the symbols behind the pillars
- Combinations for the LEFT pillars is Eagle, Snake, Fish
- Combinations for the RIGHT pillars is Fish, Eagle, Eagle
- Go further and you will see another puzzle
- Combinations for LEFT pillars is Snake, Fish
- Combinations for RIGHT pillars is Fish, Eagle
Eighth Objective: Battle and Battle
- Continue through hallways and defeat all enemies that appear
- Before going to the final room, Tolfdir will rejoin
- Get master chest in the room before the boss
- Prepare for boss fight on this Under Saarthal Skyrim Mission
- Tolfdir will drains energy from the energy sphere in order to be able to damage Jurik Gauldurson (boss)
- After that, defeat the boss and recover Gauldur amulet fragment
Ninth Objective: Talk to Arch Mage Saros Aren
- After the battle, a scene will occur
- Before going out through the door behind the sphere, find new Dragonshout power called Ice Form and treasure chest
- Travel back to the College of Winterhold to inform Arch Mage about the discovery
After talk to the Arch Mage, you have completed the Under Saarthal Skyrim Mission perfectly. The rewards of this Under Saarthal Skyrim mission would be the Staff of Magelight.
List of the Most Used Skyrim Console Codes
Elder Scrolls V: Skyrim is one of the most complex games that released these times, especially with a lot of Skyrim console codes that available to be done in order to make the game easier. Although some people called it cheating, some others are only thinks that the console codes are only a ‘little help’ to make the game easier. Either way, the usage of Skyrim console codes can possibly cause glitches or error on your game. But most important of all, using console code to make the game easier would surely affect the full game experience. So, do it with your own risks!
On PC version, Skyrim console codes can be accessed using the ` key and open the Cheats Console. You can enter multiple commands one at a time but be wary as some codes are requires you to target certain object with your mouse, while at the same time the console box is open. After the command box opened, you can input any of these Skyrim console codes and see for yourself a great change on your game.
Skyrim Console Codes

- resurrect; this code only can be used if you click a NPC before typing the code. This code will bring NPC back to life. Resurrect is especially useful when NPC was killed accidentally as most NPC are important on the game
- setessentual <base-id> 0/1; this code will make any NPC mortal or immortal. This code is mostly used when you need to go to dungeon with a lot of tough enemy lurking, so by making your companion NPC staying alive in the dungeon, this code is extremely important.
- player.modav <attribute> <amount> ; most gamers use this code to modify health, carryweight, magicka, meleedamage, or stamina and the modification will persists after the game loaded. Some gamers think this code is cheating as they can make their character to be very powerful as godlike, though some other only uses the code to increase the carry weight
- addfac <variable> 1 ; you want to married a NPC or moves a NPC to a faction, use this code. Though some glitches is known to happens a lot
- equipitem <formid>; a nice code to make your followers NPC stronger as you can make them equip one item, e.g. weapon, from their inventory
- showinventory ; not really a cheat code as this code only allow you to show the character’s inventory when you click them before typing this code
- fov <value>; this code is not recommended for beginner as the code allow players to see more to the left and right of their weapon
- set timescale to # ; having problem with merchant’s stock or money? This code is surely able to help you as this code change the time movement rates
- additem <base_id> <value> ; this code is very useful for merchant as they can get rid of items and adding money
- player.additem <base_id> <value>; absolutely a cheating as you can even get quest item in your inventory
Once again, the usage of any or all of those Skyrim console codes could ruin your mood and experience of playing Skyrim. Moreover, it’s not feels too satisfying if you play the game easily with the skyrim console codes compared to play it honestly.
Ultima Online Tips: Easy Money Making Guide
On Ultima Online, money is really important as you can go further in the game without much problem. However, beginners usually found it difficult to make money in this game. Actually, there are not so difficult to make money as there is various ways to make money in Ultima Online. The main problem for beginner is probably they don’t have enough time yet to wander around and guess the way themselves. Not to worry as this article will provides an easy guide to make money for you all newbie in this game. Stay tune!
Ultima Online
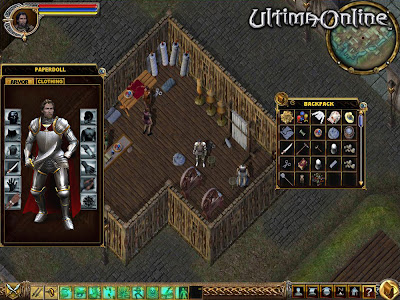
First way to make money is surely to kill enemies. Similar with other RPG, Ultima Online provides you with tons and tons of enemies to kill, which is the best way for beginner to obtain money and sometimes item to be sold or wore. However, killing stuff would become boring and cannot give much more after a while. That’s when you should change the way you make money.
The second guide for easy money on Ultima Online is to do tailoring. Besides money as rewards, you can also get rare cloths and wore it or sell it to get more money. The best way to make money from tailoring is to fill out the BODs (Bulk Order Deeds) as this gives quite amount of money and sometime the rare cloths as rewards. Some of the rare clothes are including blaze, ice white, ice blue, ice green, and others. And if you lucky enough, this method could give you a bless deed, which sold for 900k. Other way to get money from tailoring is to skin sheep for their wool. Spin those wools to yarn and use a loom to turn it into cloth. All the cloth you make can be sold to NPC on Ultima Online.
Blacksmith is one of the best ways to make money on Ultima Online. By crafting armors or weapon and sell it to NPC, you will get quite amount of money. But, the amount of money you receive would depend on how good your crafted items are. The only way to raise your blacksmith skill in order to be able to craft better weapons and armors is to repair for others. However, if you lucky enough to get runic hammer, then you can craft magical weapons and armors, which sold a lot in Ultima Online.
Another way to make money easily in Ultima Online is bowcrafting. Making bow for yourself or sell it to NPC would make quite money, though not that much. To make a bow, use an axe and chop logs from trees using lumberjack skill. Then, use the fletching tools in order to turn the logs in shafts. Next step is to kill a burn and get the feathers to make the arrow. Last step is to put shaft and feather together. Repeat these steps until you get quite amount of bow and sell it to NPC to get money.
Actually, there are other ways of making money in Ultima Online. But those ways are the easiest to do for beginner, yet give enough amount of money at the beginning of your journey in this game. However, if you still want to know the rest, there is Cooking (cook fish steak and sell them as 100 fish steaks sold for 400 gold), Animal Taming (tame horse, ostards, fire steeds, dragons, white wyrms, nightmares, or unicorns and sell them for good money), Alchemy (make motions and sell them), and many more. In short, there are always way to get more money in Ultima Online.
Fighting Kiln Runescape Guide - Things to Prepare
Fighting Kiln RuneScape probably is the most exciting opportunity for many combat fans that plays runescape. However, Fight Kiln is a brutal combat minigame that requires high skilled player and quite preparation. Some requirements also need to be fulfilled to enter The Fight Kiln RuneScape battle. Even most veterans that familiar with the Fight Caves would probably found it difficult as this fight is on a whole different thing. Tactics and preparations become the most important part as you will be fighting with endless onslaught of TokHaar before finally the final boss awaken and join in the battle. Even so, the rewards you got from this battle, the right to wear the TokHaar Kal is definitely worth all the efforst as this cape is the only one in RuneScape that able to give you +8 strength bonuses.
So, what is the requirement and preparations you need to make in order to survive Kiln RuneScape fight? Well, the first requirement is this fight only available to members. You also need to complete The Elder Kiln quest before. And the last requirement is to sacrifice a Fire Cape, which will give you a full permanent unlock access. After all the requirements fulfilled, all that left is to prepare the gear such as item, weapon, and armors in order to be able to survive the whole battle in Kiln RuneScape fight. Here is the list:
Kiln Runescape

Recommended Gears to Prepare before Kiln RuneScape Fight:
- Helmet: Neitznot, Verac’s Helm
- Cape: Soul Wars, Fire Cape, Skill Cape
- Amulet: Fury, Glory, Arcane Stream
- Ammo: Diamond Bolts, Broad Bolts
- Weapon: Chaotic Rapier, Whip, Armadyl Battle Staff, Polypore Staff, Chaotic Crossbow, Rune Crossbow
- Torso: Bandos Chesplate, Torages Platebody, Armadyl Chesplate, Karils Top, Ganodermic Top
- Shield: Eagle Eye Kiteshield, Chaotic Kiteshiled, Spectral Shield, Dragonfire Shield
- Legs: Bandos Torso, Torags Platelegs, Armadyl Chainskirt, Karils Skirt, Ganodermic Legs
- Gloves: Best RFD Glove
- Boots: Ragefire, Glaviens, Ranger Boots, Steadfasts, Dragon Boots
- Ring: Charged ring
Recommended Items for Kiln RuneScape Fight:
- Enchanced Excalibur; very useful in fight
- Dreadnips; useful to make TokHaar-Ket-Dill a lot easier to be defeated, this item can be obtained with a 450 rank on Dominion Tower. However, you can also use a pickaxe if you are unable to obtain this item
- Armadyl Runes; if you already using Polypore Staff, you will not need this item
- FLASKS; a very essential item as you need to bring your entire potion in flasks
- Saradomin Brew
- Super Restore
- Prayer Renewal
- Yak Pouches
- Uni Pouch
Recommended Skills for Kiln RuneScape Fight:
- Overloads; you need to made this skill from 96 Herblore or 92 Herblore + Spicy Stews. Herblore can be found in easily any cave. This skill will make your fight a lot easier
- 85+ Attack, Strength, Defence, Hitpoints, Range, and Magic
- Curses/92+ prayer; Soulsplit would be incredible useful in fight for healing
- 96+ summon
After prepares all of those recommended things for Kiln RuneScape Fight, all that left is to play tactically on each wave before the final boss finally join the battle. Hopefully the list of recommended item above would be helpful on your Kiln RuneScape Fight.
Important Perks for Skyrim Archery
Not many players in Skyrim that chose to use Skyrim Archery as their combat type. It is because Archery is the hardest combat type to master, especially in the beginning of the game as this type offer less rewards than close combat or magic. Moreover, without the right perks and tactics, Skyrim Archery can be somewhat lame and weak as you cannot use restore health or use shield while holding the bow. Another disadvantage of using Archery as combat type is you have to constantly supply the arrows.
But actually, if you have use the right perks and tactics on Skyrim Archery, this combat type can be the most satisfying of all because you are able to use the hardest type to play further in game, which is surely better than those who use close combat weapon or magic. That is why, this article has a lot of things to tell to you about the best way to build your character and maximize the Skyrim Archery into its full potential. Before we start, there are a couple ways to build your character in Archery, including pure archer, tank archer, or sneak archer that also able to use dual daggers. No matter which type of build you want, these perks below is essential to be a great archer.
Skyrim Archery

First guide and probably the most important guide to maximize Skyrim Archery is to get all the Archery perks as soon as you start the game. All the archery perks are including Damage, Eagle Eye (to zoom), Critical hits, Staggering, and Paralyzing as these perks makes you easier to survive at the beginning of the game. Getting those Skyrim Archery perks at the beginning of the game are able to prevents any of enemies that use close combat type (which is the biggest disadvantage of being archer) when your skill is not good enough to take them on. With these perks, you can at least give them a good fight.
Next perks to get on Skyrim Archery is the Conditioning (Heavy Armor 70) and Deft movement (allow you to avoid 10% of melee damage) as the conditioning allow you to walk and move fast in Heavy Armor, while Deft movement already explain itself. Unfortunately, the Conditioning perk takes quite a while to get, so at the beginning you should stick with Light Armor, which able to protects you but allow you to move faster and in stealth. You can always use the Light Armor is you don’t want to use the Conditioning perk or Heavy Armor after all.
Another important perk for Skyrim Archery is Sneak as this skill allow you, as an archer, to kill people in only one or two hits. Moreover, this skill allows you to avoid complete brawl so you can save potions and arrows. As we all know, close combat is very dangerous for archer so Sneak is a perfect skill to avoid close combat optimally. If you already level up your Skyrim Archery, get stronger weapon, and your sneak skill already reach level 40, then you can multiple the sneak attack damage by three times, which is absolutely amazing for an archer.
The last perk you need to get for Skyrim Archery is the Conjuration as in Level 50, this perks give you Bound Bow skill. This is probably the best and most wanted skill for all archers as it gives you infinite arrows and it is able to overlap with all archery perks.
Poptropica: S.O.S. Island Walkthrough
A couple months ago, Poptropica: S.O.S. Island has unveiled and offers a fun and a lot challenging adventure island. This walkthrough is divided into a couple of section, which each section contains the most important things to do to finish the game so you won’t find any detailed step by step guide here.
Poptropica: S.O.S. Island Walkthrough

SECTION 1: Upon Arrival
At the beginning of Poptropica: S.O.S. Island, a couple of message will appear telling you to rescue the all the passengers. Select start to begin the rescue operation. Go left to reach the emergency rescue boats and reach the smokestack on top of it. Find a large snowball and use it to unblock the entrance to the Pequod (the sinking ship’s name, remember?). After the entrance opened, find the ship’s captain and a couple of conversation will occur which tells you to rescue all the remained passenger by click on the knob that located on the emergency console, a door will open. Go through the door and you will find a young poptropican on the door number six just before the exit sign. Rescue him and you will shortly arrive on the iceberg and given Whale Song Gadget by the man you just saved.
At the beginning of Poptropica: S.O.S. Island, a couple of message will appear telling you to rescue the all the passengers. Select start to begin the rescue operation. Go left to reach the emergency rescue boats and reach the smokestack on top of it. Find a large snowball and use it to unblock the entrance to the Pequod (the sinking ship’s name, remember?). After the entrance opened, find the ship’s captain and a couple of conversation will occur which tells you to rescue all the remained passenger by click on the knob that located on the emergency console, a door will open. Go through the door and you will find a young poptropican on the door number six just before the exit sign. Rescue him and you will shortly arrive on the iceberg and given Whale Song Gadget by the man you just saved.
SECTION 2: Back to the Ship
After a scene, the man you just saved told you to back to the ship to save more passengers, so there you go. Enter the ship through entrance and go to Ball Room on your left. Here, you will hear a lady that ask for help so swim down and go right to find a white chair while collecting free drink on the way. Aim your shot by standing on the white chair and try to shot the glass containers so add more water to the Ball Room. You can now save the lady. Another scene on the iceberg occurs with the lady you just save standing next to you.
After a scene, the man you just saved told you to back to the ship to save more passengers, so there you go. Enter the ship through entrance and go to Ball Room on your left. Here, you will hear a lady that ask for help so swim down and go right to find a white chair while collecting free drink on the way. Aim your shot by standing on the white chair and try to shot the glass containers so add more water to the Ball Room. You can now save the lady. Another scene on the iceberg occurs with the lady you just save standing next to you.
SECTION 3: Back to the Ship, Again
As the Pequod sink further, you need to once again back to the ship to rescue more passenger. This time, you need to enter the ship through a hole that located where the Pequod stuck on the Iceberg. Click a small pulley wheel to reveal a door and click it to enter new room. Reach surface and get your character on top of the chairs and climb on to the top of the ship using any object you found to rescue the next passenger. Here, you will found a puzzle to save the passenger. Solve the puzzle and a scene will occur which ends that an engineer give you a Pipe Wrench.
As the Pequod sink further, you need to once again back to the ship to rescue more passenger. This time, you need to enter the ship through a hole that located where the Pequod stuck on the Iceberg. Click a small pulley wheel to reveal a door and click it to enter new room. Reach surface and get your character on top of the chairs and climb on to the top of the ship using any object you found to rescue the next passenger. Here, you will found a puzzle to save the passenger. Solve the puzzle and a scene will occur which ends that an engineer give you a Pipe Wrench.
SECTION 4: Rescue the Chef
Hop on the life ring and other objects until you reach the top of the ship. Find your way so you found a propeller and follow it to reach the exit. You will find the chef in the freezer and you need to push him off of each ledge. Never attempt to push the chef or the box you found inside as it can make the chef stuck in any holes in the ship. Find your way by climbing the box and pipe and save the chef.
Hop on the life ring and other objects until you reach the top of the ship. Find your way so you found a propeller and follow it to reach the exit. You will find the chef in the freezer and you need to push him off of each ledge. Never attempt to push the chef or the box you found inside as it can make the chef stuck in any holes in the ship. Find your way by climbing the box and pipe and save the chef.
SECTION 5: Rescue the Captain
After save all passengers, all that left is to safe the captain. Without spoiling to much fun of this Poptropica: S.O.S. Island walkthrough, all you have to do is to swim on to the room where you find the captain. Here, you need to use the item you got, including Whale Song Machine and Pipe Wrench to make the Whale save you and the captain.
After save all passengers, all that left is to safe the captain. Without spoiling to much fun of this Poptropica: S.O.S. Island walkthrough, all you have to do is to swim on to the room where you find the captain. Here, you need to use the item you got, including Whale Song Machine and Pipe Wrench to make the Whale save you and the captain.
Those Poptropica: S.O.S. Island walkthrough is not so detail as it is better and much fun if you experience it by yourself. However, hopefully this Poptropica: S.O.S. Island walkthrough help you to going further in the game.
Tips to Cure Vampirism in Skyrim
In Skyrim, most players that have vampirism disease would do whatever it takes to cure vampirism in Skyrim. It is because while being vampire, they will be hated and hunted so even every single person that see them will eventually kill them at sight. While some players found it interesting at the beginning, most of them will eventually feels worried and want to get back to their usual self immediately. Thankfully, there are actually a couple of methods that can be used to change the player from vampire to their usual back without problem.
Cure Vampirism in Skyrim

The first method of how to cure vampirism in Skyrim is to get rid of the disease by consuming any common potion that cures common disease. However, it will only works when you have just contracted with the disease as it needs three full days to change you into a full vampire. Drinking potion will immediately cure the disease if you still within those three days after contracted. If this don’t work, but you are sure that there is no more than three days after you contracted with the disease, try the Shrine to Talos outside the White run or Dragonsearch. Activating this shrine is known to cure any disease. But once again, it will no longer work if you already become the vampire.
Vampirism in Skyrim consists of 4 stages. If you still in Stage 1 to 3, you don’t need to worry of getting killed by most people. But if you already on Stage 4, than every person that see you will attempt to kill you right away. There is almost no way to cure vampirism in Skyrim if it’s already reach stage 4 except to reduce the stage into stage 3 or lower. To do so, just wait until night and drink blood of sleeping person. Crouch or sneak around any sleeping NPC and drink their blood right away will transform you into Stage 3 vampire. If you already in stage 3 or lower vampire, you need to do a quest in order to get rid of this disease completely.
First step is to speak to any Inn Keeper or Bartender about the latest rumors, then you will get a rumor that Falion in Morthal is studying vampires at that time. You know what to do next, just go to Morthal (East of Fort Snowhawk) and speak to Falion. He will then tell you about getting Black Soul Gem. There is two way to get this Gem. The first one is to buy it from Falion and the second one is to cast a Soul Trap on human and kill them. Fill the Black Soul Gem and return to Falion to complete the ritual. And you will cure from vampirism. In case you don’t know, you can buy the Soul Trap spell from any magic vendor. Just go to College of Winterhold or White run to find magic shop. That’s the second and only way to cure vampirism in Skyrim.
Unfortunately, there is no information yet about the possibility of getting the vampirism disease again if you already had one and cure it. So to be sure, just avoid getting hit and get the contract of vampirism whenever you fight against vampires. But sometimes, if you want to know how the feel of being vampire or you wants to get power of vampire that resides in Stage 1 to 4, you can just try to be vampire and whenever you get bored or worried about getting killed each time, just do those steps above to cure vampirism in Skyrim.
Need More Gems? DragonVale Gem for Gem is The Answer
DragonVale gem for gem is a way to get more gems from your friends. It is actually pretty normal as no online game that requires no friend at all. So, by adding more friends, each player of DragonVale can send and receive gems in order to do more on the game. Friends can be useful when you need some gems in order to make the game easier. They can trade their gem for the eggs or dragon you have, for example, you could trade your rare dragon with more than 100 gems, or you can do DragonVale gem for gem with your friend so you can easily get at least three gems per day.
Whatever you do, never play the game without having even a single gem in your possession. Sometimes, the beginner of DragonVale will spend their entire gems to perform various actions, such as cutting bushes and trees down, spend them on nursery, and many others. Actually, the gems are very important thing every player should treasures as it needed to go much further in the game. In-game play even shows the importance of gem as they only offers to trade gems for coins but not vice versa. As for the amount, you can trade 50 gems for 196,000 coins.
The bad news is there is no other way to get more gems except to buy from the market using coin (which is really expensive), or purchase the gems with real money, which surely inconvenient for most players. But the good news is if you have enough friends to add, there is high possibility that you will receive gems for free by doing DragonVale gem for gem. That is why there is a lot of posting in game forums or other website in internet that asking for every DragonVale players ID in order to get more friends and thus lead to more possibility of having gem by trading with egg, dragon, or gem.
DragonVale Gem for Gem

Each player can only do DragonVale gem for gem up in limited amount. To make it more clearly, you can only send a single gem to 3 different people each day. But it doesn’t mean that you can only get 3 gems per day as there is no limit of receiving gem from different player. For example, if you have 100 friends on the game center, you can get up to 100 gems per day if all of your friends send you one. Just make sure that you can give them back your gem, though some of the players seems very generous by only giving gem for free to his/her friend without asking for gem in return.
So, what are you waiting for? Leave your ID on by leaving comment on this article so any DragonVale players can add you on the game center. This way, you can get more gems and do some important things such as speed up the game (egg hatching, dragon growth, and island purchasing for expansion purpose), important transaction (purchasing rare dragons, buy rare eggs, buy essentials in market), or tending the park (clearing bushes, making nurseries, making breeding places), all thanks to DragonVale Gem for Gem.
Use SKSE Patch to Improve Skyrim Frame Rate
SKSE is a popular patch to improve the frame rate of Skyrim. It is because sometimes, playing Skyrim on PC could tests your patience as there is probably some lag or loss of frame rate while playing. This problem mostly occurs when your PC is only in ‘minimum requirement’ level to play Skyrim or in harsh words: ‘your PC spec is not high enough’. Thankfully, SKSE was released and claimed to be able to improve your frame rate by up to 40% for all situations that requires most source of CPU. The main concept of this SKSE patch is the patch rewriting some x87 FPU code while at the same time inlines many of useless function that resides on the critical paths. Bethesda, the developer, probably compiles the game without using optimization flags so those useless functions are in the way.
Before you learn how to use the SKSE in order to improve your frame rate, you need to know what exactly the SKSE is. Well, SKSE stands for Skyrim Script Extender, a plugin that able to increase frames per second (FPS) in in-game areas that requires most resource of the CPU, e.g. in cities. Not long after released, many users that already use SKSE reported that they FPS increased for around 2 until 10 FPS. But some others reported that they can get up to 20FPS increase while playing Skyrim.
To use this SKSE patch, things that you need to prepare are the Skyrim version 1.3.10 and SKSE version 1.4.2. Here’s how to install the patch:
SKSE

First method of installation
- Download the latest version of SKSE patch
- Install the downloaded patch into the same folder as the Skyrim’s executable files, the TESV.exe
- Copy TESV Acceleration Layer to
\Data\SKSE\Plugins. If the SKSE and Plugins don’t exist yet, create it - Launch Skyrim by running skse_loader.exe
Second method of installation:
- Download the latest version of SKSE patch
- Unzip the files inside the file you downloaded
- Copy all the .dll and .exe files to your Skyrim directory, which mostly placed on C:\Program Files\Steam\SteamApps\common\skyrim\.
- Launch the game by running skse_loader.exe
After you launch the game, you still need to make sure whether the SKSE patch is already running or not. Here is how to do it:
- Open in-game console by pressing ~ key
- Type GetSKSEVersion and press enter
- You will get the version of SKSE that running in your game
- But if none displayed, then SKSE is not running yet so it is recommended to reinstall the SKSE again
No, you are not done yet. In order to make sure that the SKSE is running its job, you still need to do some tests. The first test is to check that the TESVAL mod is loaded correctly. To do this, just simply follow the steps below:
1. Go to Skyrim directory and open skse.log, you can open this file using notepad
2. Find text in the log that mentions like below:
“checking plugin G:STEAMSteamAppscommonskyrimDataSKSEPluginsTESVAL. dll
plugin G:STEAMSteamAppscommonskyrimDataSKSEPluginsTESVAL. dll (00000001 TESVAL 00000001) loaded correctly”
3. If you cannot find any of those words, then the TESVAL mod did not load correctly. Reinstall the mod or SKSE could solve the problem
2. Find text in the log that mentions like below:
“checking plugin G:STEAMSteamAppscommonskyrimDataSKSEPluginsTESVAL. dll
plugin G:STEAMSteamAppscommonskyrimDataSKSEPluginsTESVAL. dll (00000001 TESVAL 00000001) loaded correctly”
3. If you cannot find any of those words, then the TESVAL mod did not load correctly. Reinstall the mod or SKSE could solve the problem
Subscribe to:
Posts (Atom)

